So when we last left the CSR the track had been laid for the branchline on the main level. Next was the powering of that track, which meant the track sections had to be isolated due to reverse loops and the Peco Electrofrog turnouts that I'm using. Using Peco Electrofrog turnouts require that the diverging sections of the turnout be insulated from the next track sections on the frog side of the turnout. This can be done with insulating joiners when joining the track to the turnout or by cutting insulating sections into the track. I prefer the latter, as it is much more stable and secure than insulating joiners, as they flex and deteriorate over time.
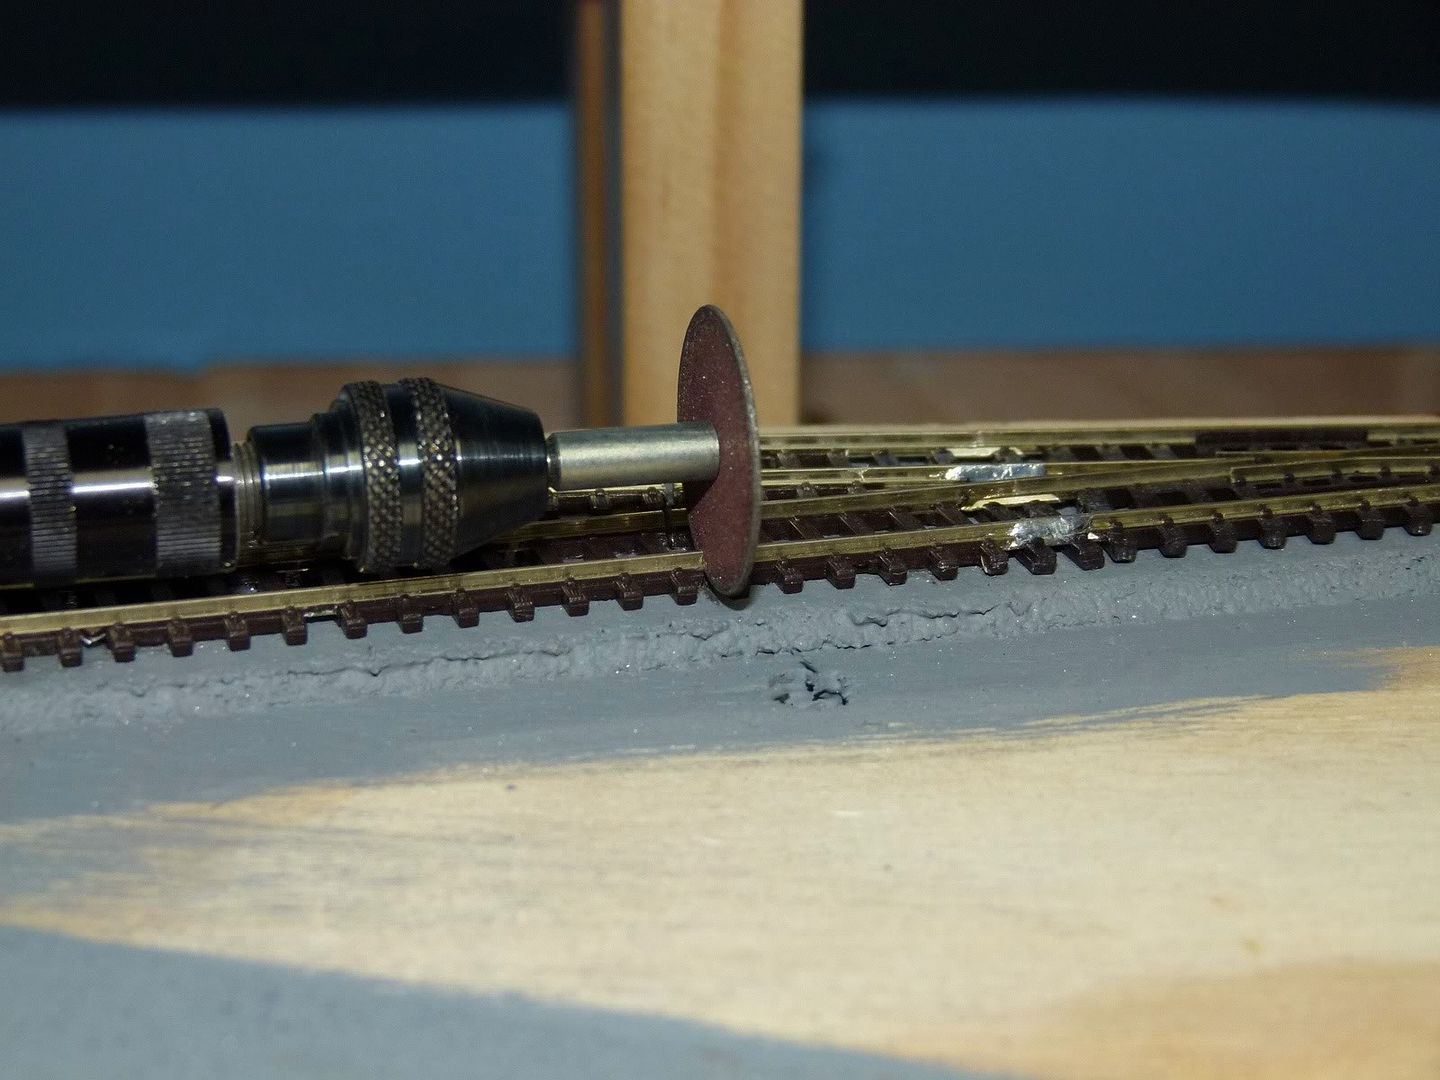
Here is the tool I use to make the insulating cuts into the track: A Dremel with a Flexshaft attachment with a #409 cutoff wheel attached.

There are other ways of making this cut including with a razor saw, however a cutoff wheel on a Dremel works best. The flex shaft is not a necessity, however it makes it much easier to cut a nice perpendicular cut into the rail as shown in the next picture. Note that the track on either side of the cut has been glued down, thus the rail will still be supported by the glued down track, something that would not happen if I had just used an insulated railjoiner.
After the cut has been made I use some .020x.100 strip styrene to help insulate the gap that has been cut in the rails. The gaps can be seen in the track above the styrene.
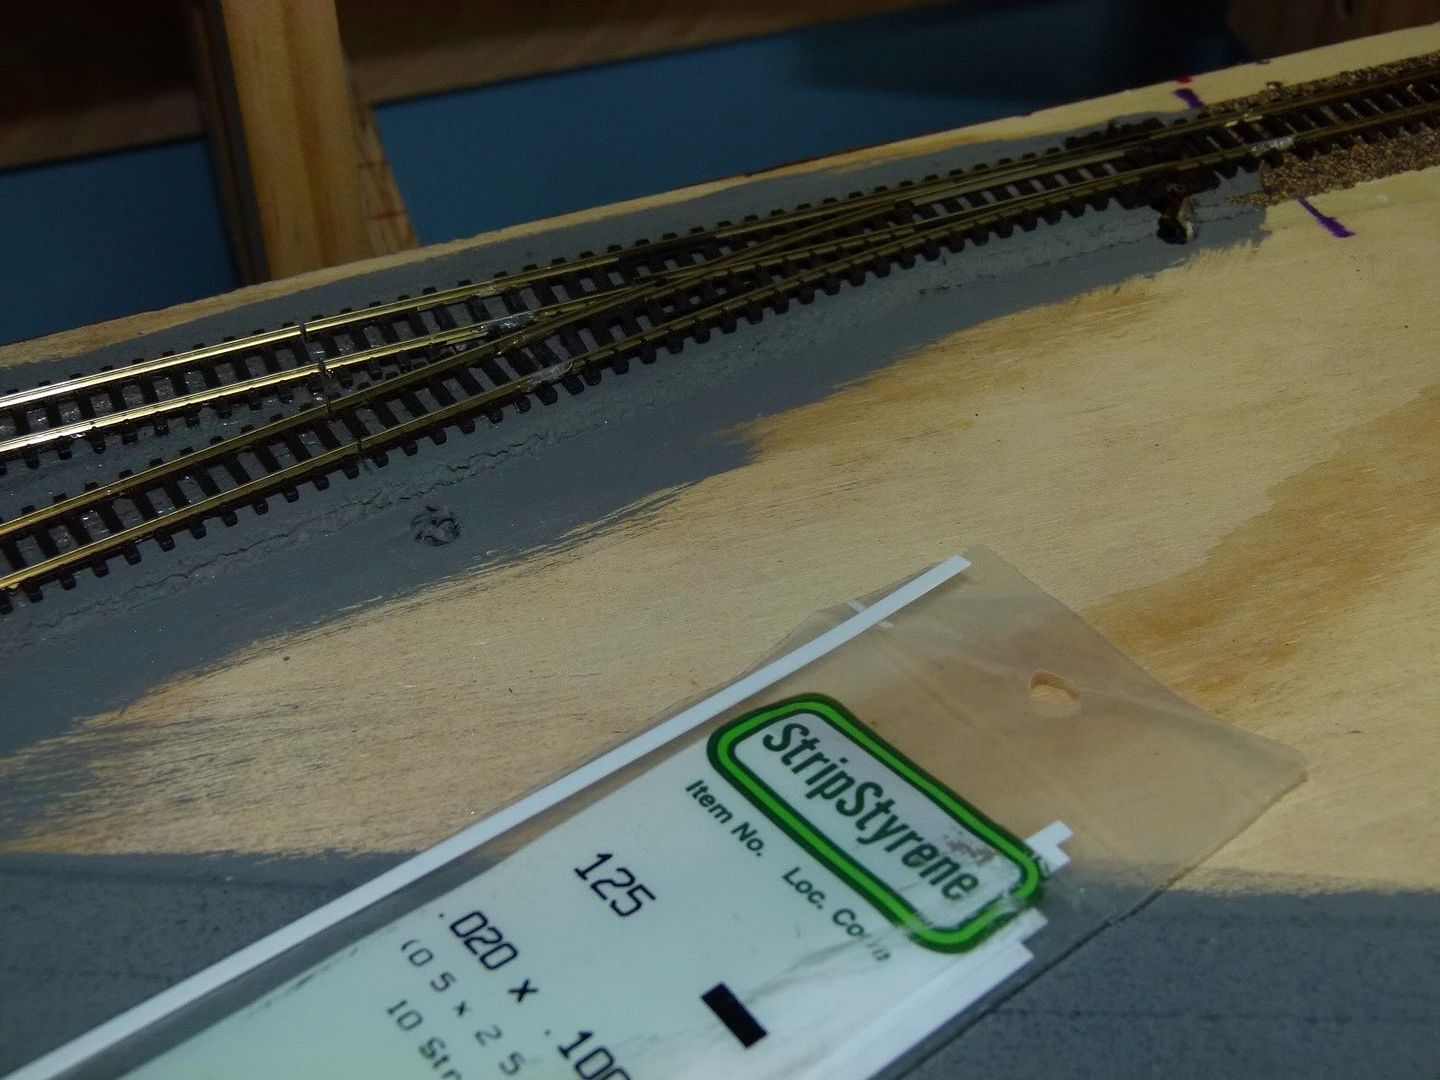
The strip styrene is put into the gap and then cut off as shown.

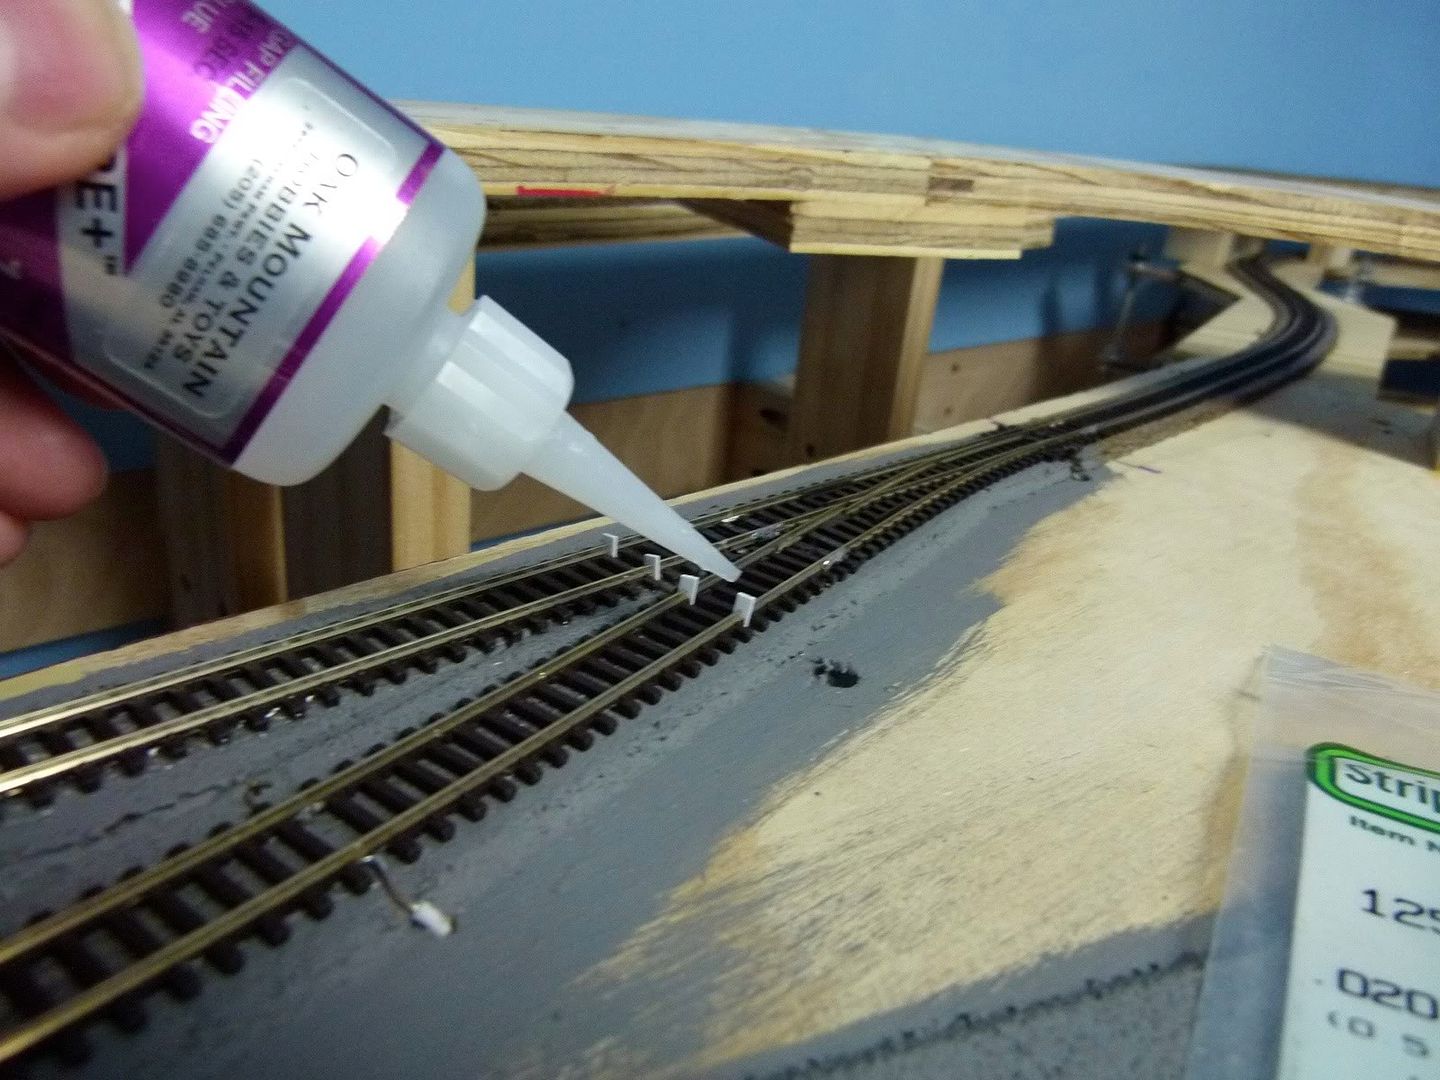
After the styrene is in place some gap filling Cyanoacrylate (CA) glue is used to glue the styrene into place in the gap.
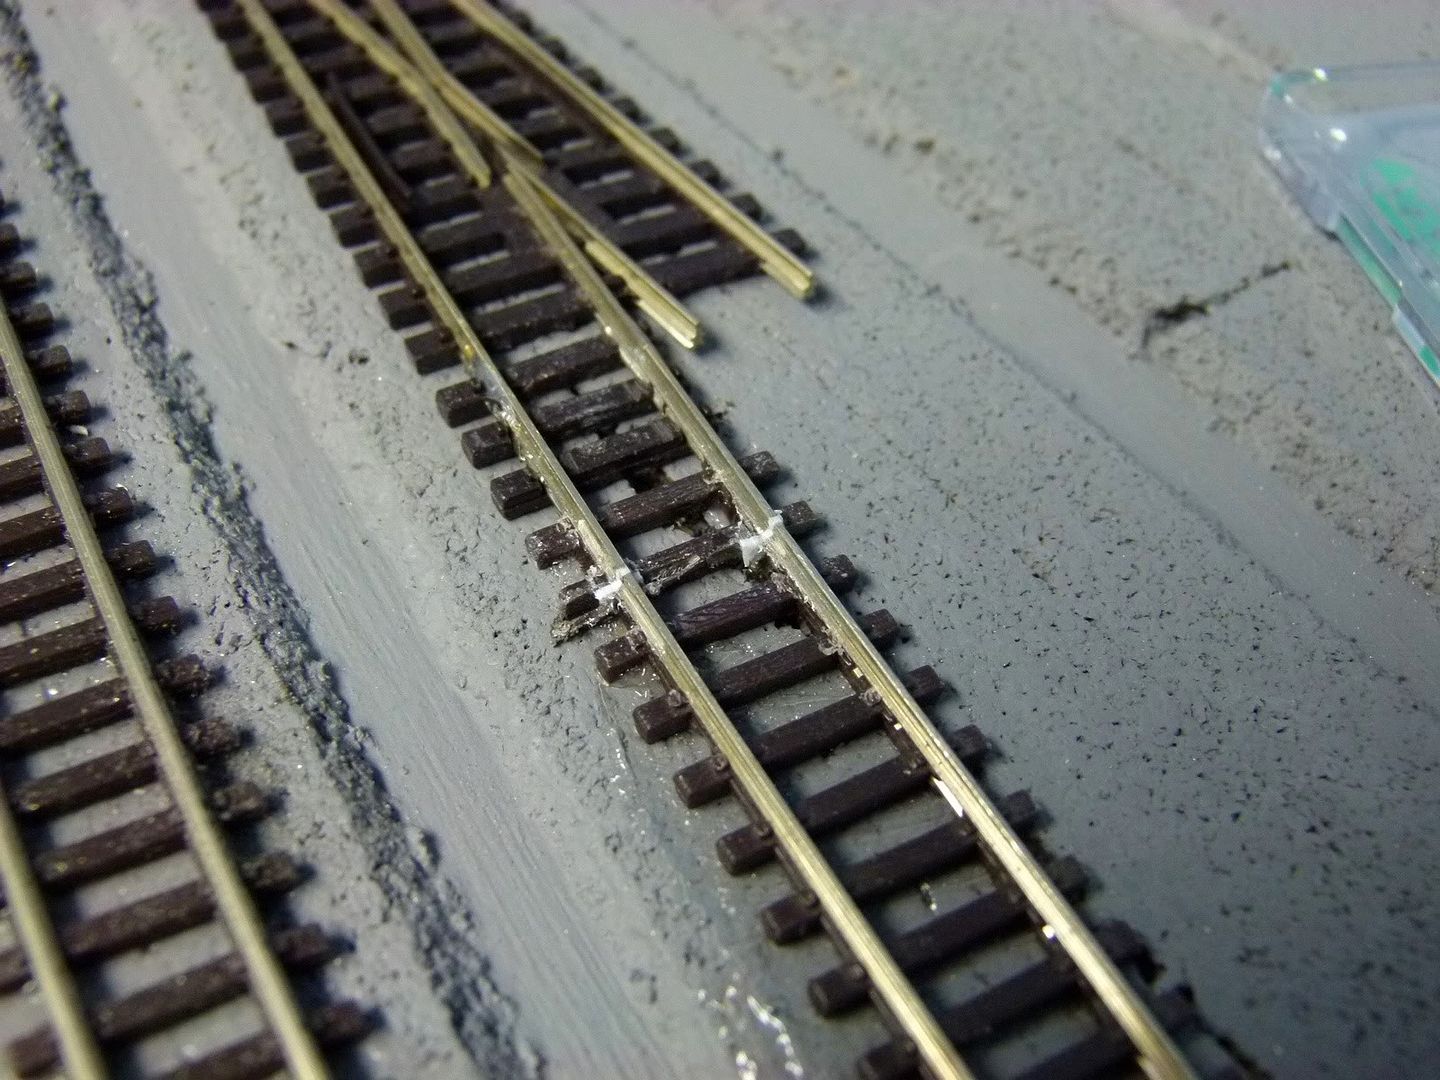
Here you can see three sets of them glued into place, waiting for the CA to dry. I usually like to wait at least a couple of hours. CA glue dries quickly when it is applied this, but when a whole drop is put into place it takes longer. I also do not use an accelerator as the joint it produces will not be as strong as one without.

Once the glue has dried I then use a small needlefile to file the styrene into the shape of the rail. The final result then looks like this:
Electrical feeders were attached to the flextrack before it was put in place, as shown in Progress Report #5. Once that piece of track is in place I drill a couple of small holes next to the track and pull the feeders thru the holes as shown.

Here are the feeders shown from below the benchwork, coming thru the wooden subroadbed.

I then attach the feeders to the DCC buses underneath the layout with red 3M Scotchloks for joining the 20ga feeder to the 14ga bus wire. Some people have had problems with intermittent connections using wiretaps like this and I have as well, but only when I was using a knockoff cheapo brand of wiretaps. I have never had a problem with a 3M brand Scotchlok failing on me. This is one place not to cheap out but to buy only the best name brand stuff.
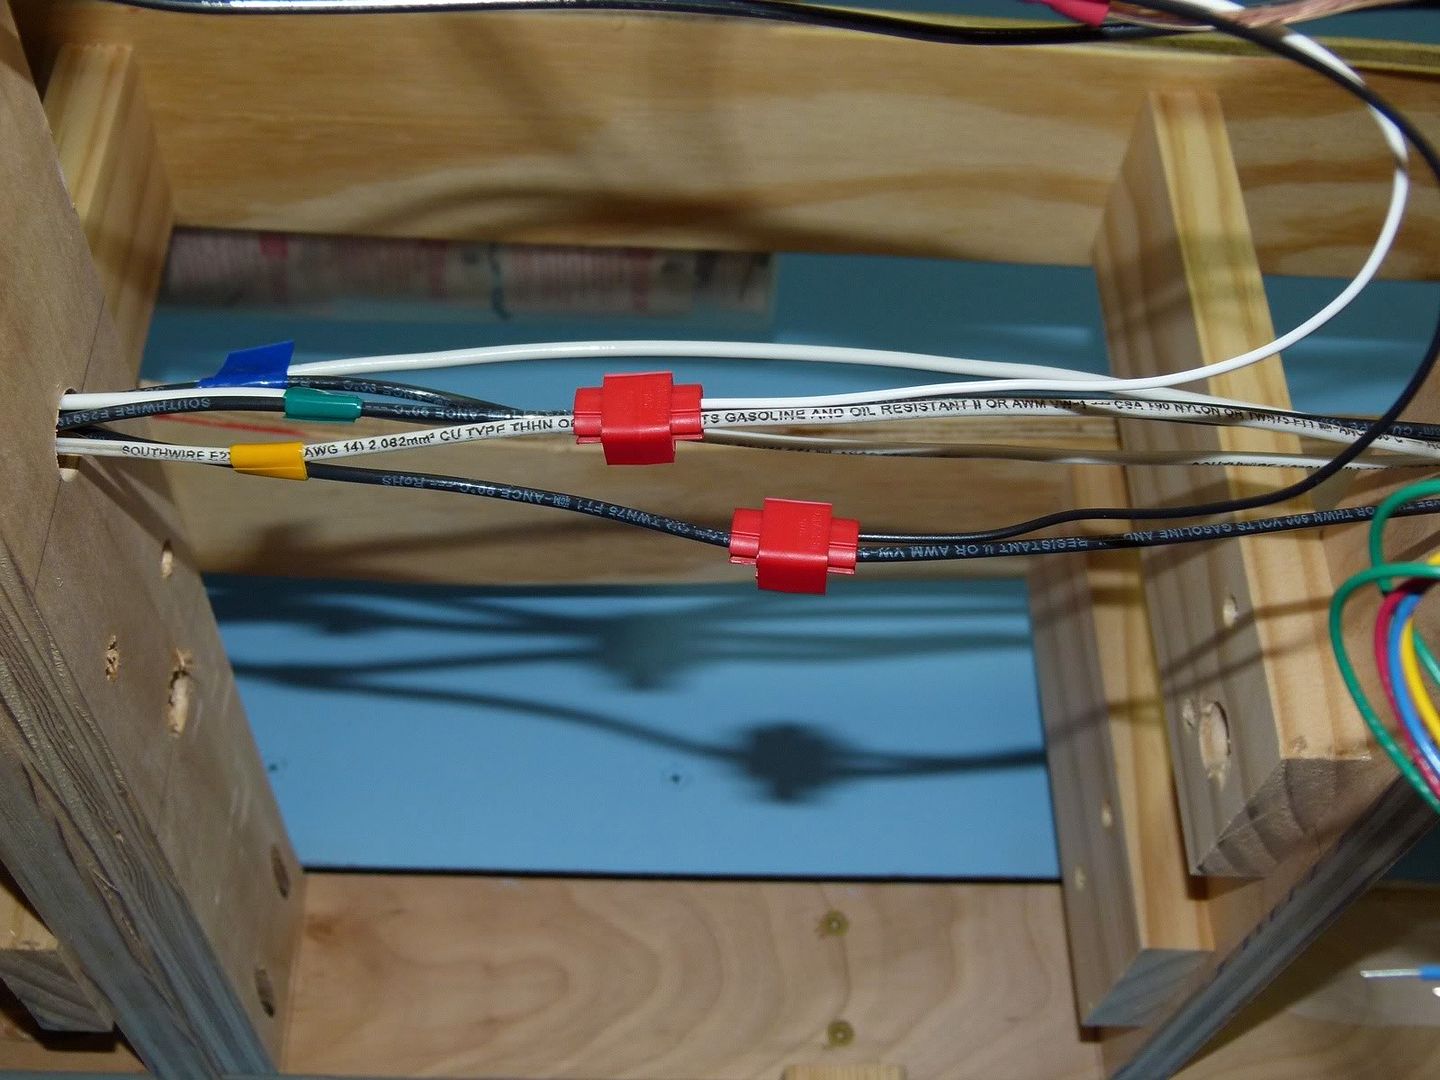
As you can see above there are 3 sets of DCC power buses running underneath this section of the layout, each of them color coded with electrical tape. These feeders are coming from the branchline, which is being fed by the yellow DCC power bus. Color coding and labeling things will make troubleshooting electrical issues easier, both in the present and in the future.
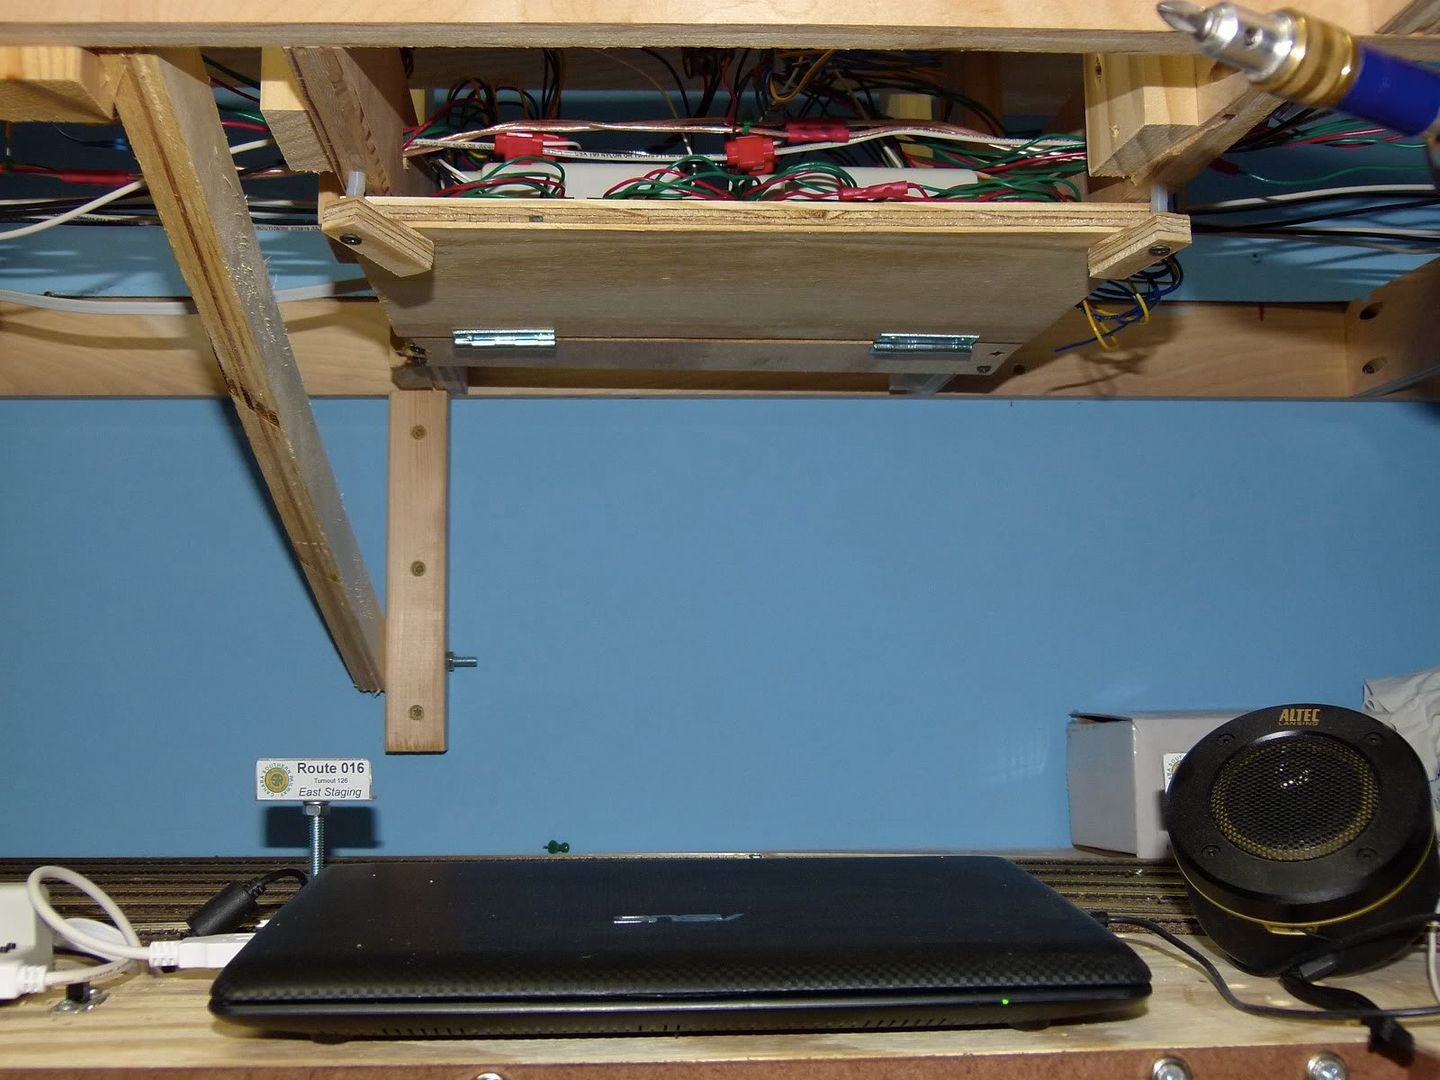
I've also put in all 6 of the Digitrax DS64 stationary decoders for the upper main level of the layout. As I was laying track on the upper level I determined it would be easier to go ahead and have the decoders ready to power the turnout machines, attaching them as I was going along. I used some scrap plywood and some hinges, mounting them underneath the layout in strategic locations. Here you can see 2 sets of decoders mounted under the layout.

Here is a closeup of one of the mounting boards, with the decoders all wired up and ready to go.

The boards fold out of the way and are held in place by a couple of strips of wood attached with some spacers and screws. Simple, cheap and effective...
So once the decoders were in I got busy with the track laying. All of the track in the main town area of the layout is in, with all sections powered and operational, with all turnouts operating remotely thru DCC as well. Here is the east side of the town area, with the branchline closest to the edge, the 2 mainlines heading up and away:
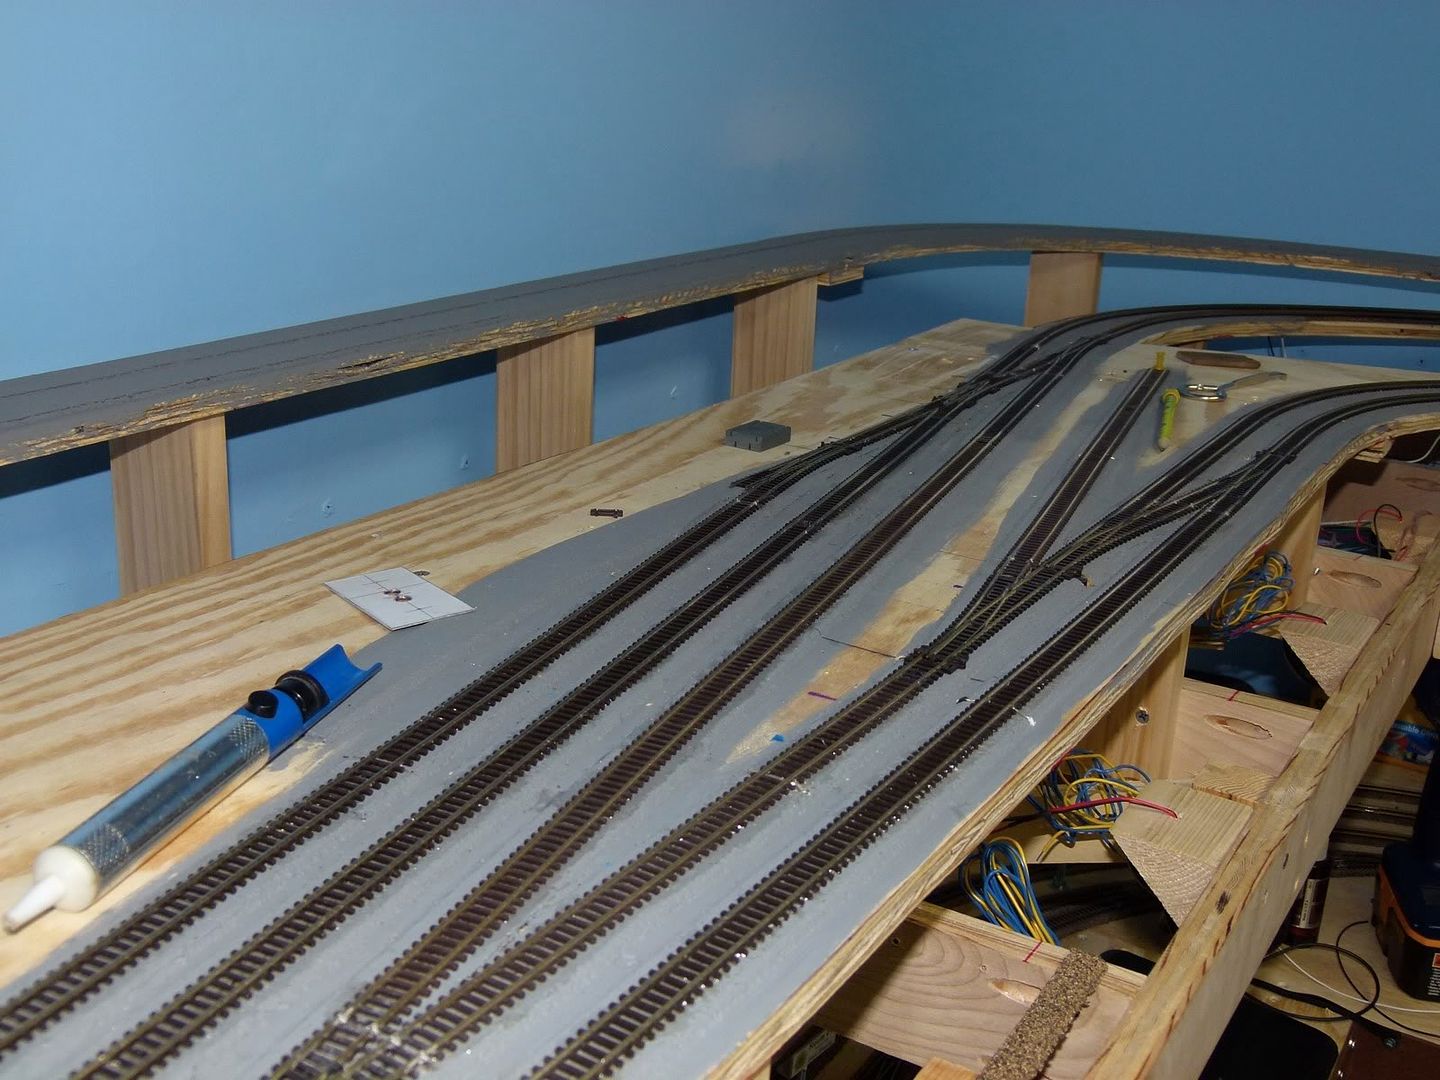
Here is the west side of the town, with the branchline once again closes to the edge, the 2 mainlines further inside, heading out underneath the temporary bridge.

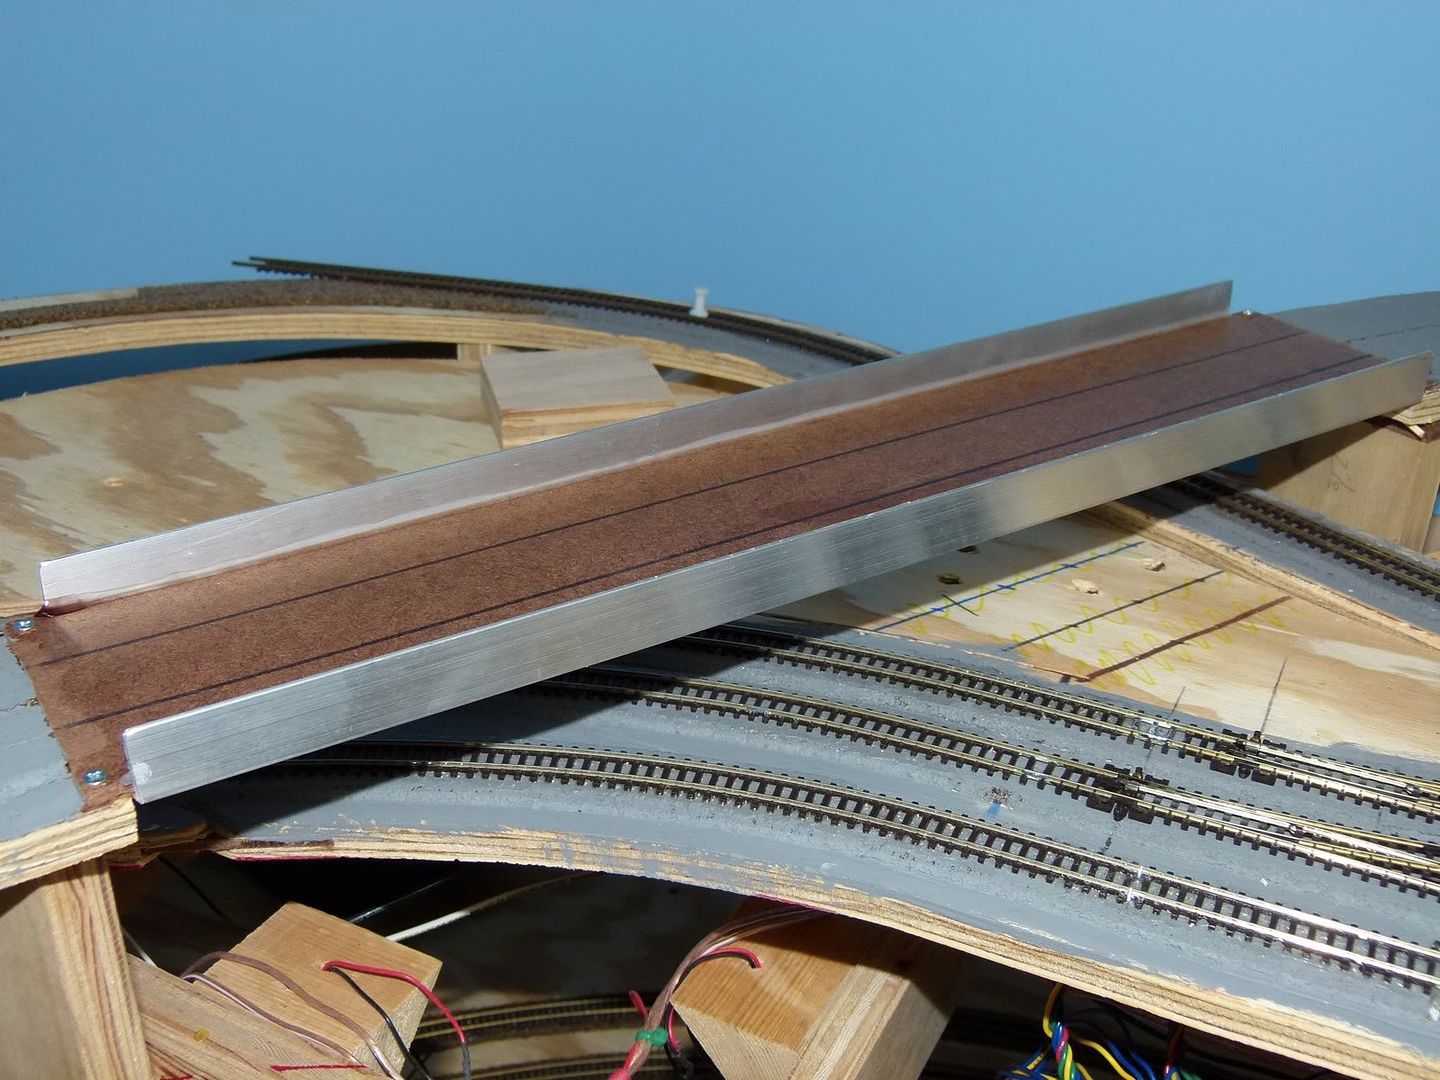
Speaking of the temporary bridge, I built it as a place holder for the 2 bridges I had shown in a previous section. They will be put into place as the scenery progresses. In the meantime this temporary bridge built from masonite and l-shaped aluminum glued together will be the placeholder.
Next step is to tie the mainlines together, and that day when the trains can run continuously is getting close......until next time!
No comments:
Post a Comment