Tuesday, July 5, 2011

Layout Progress Report #24 as of 7/05/2011

"WELL I BEEN WORKIN' IN A COAL MINE
GOIN' DOWN DOWN
WORKIN' IN A COAL MINE
WHEW ABOUT TO SLIP DOWN..."


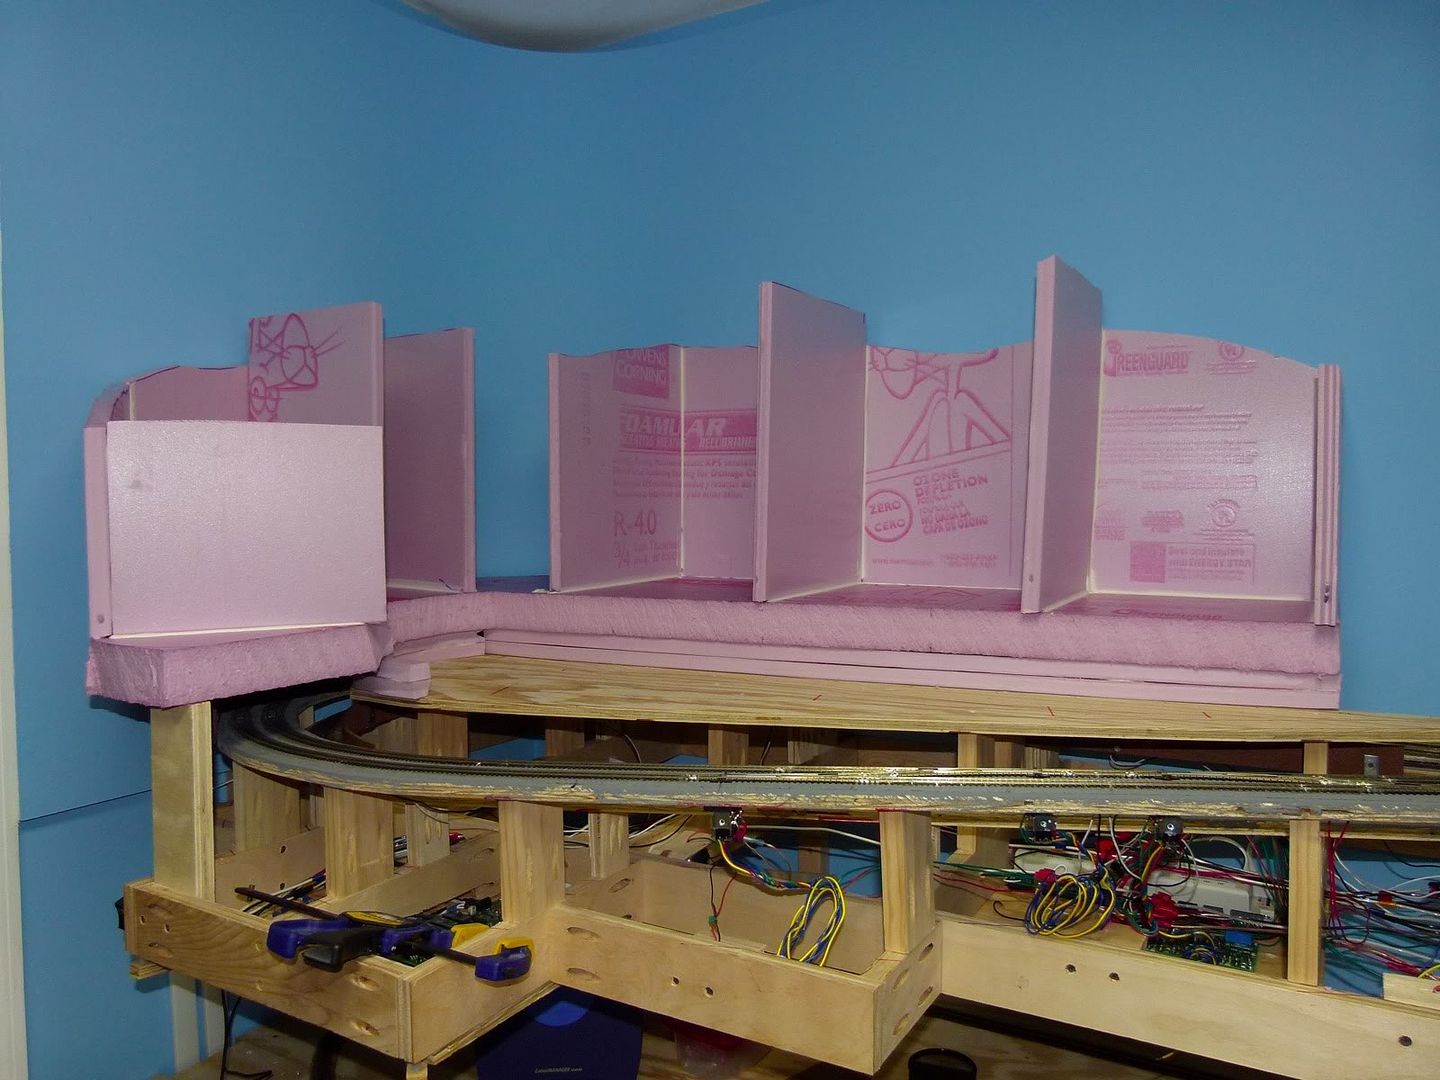
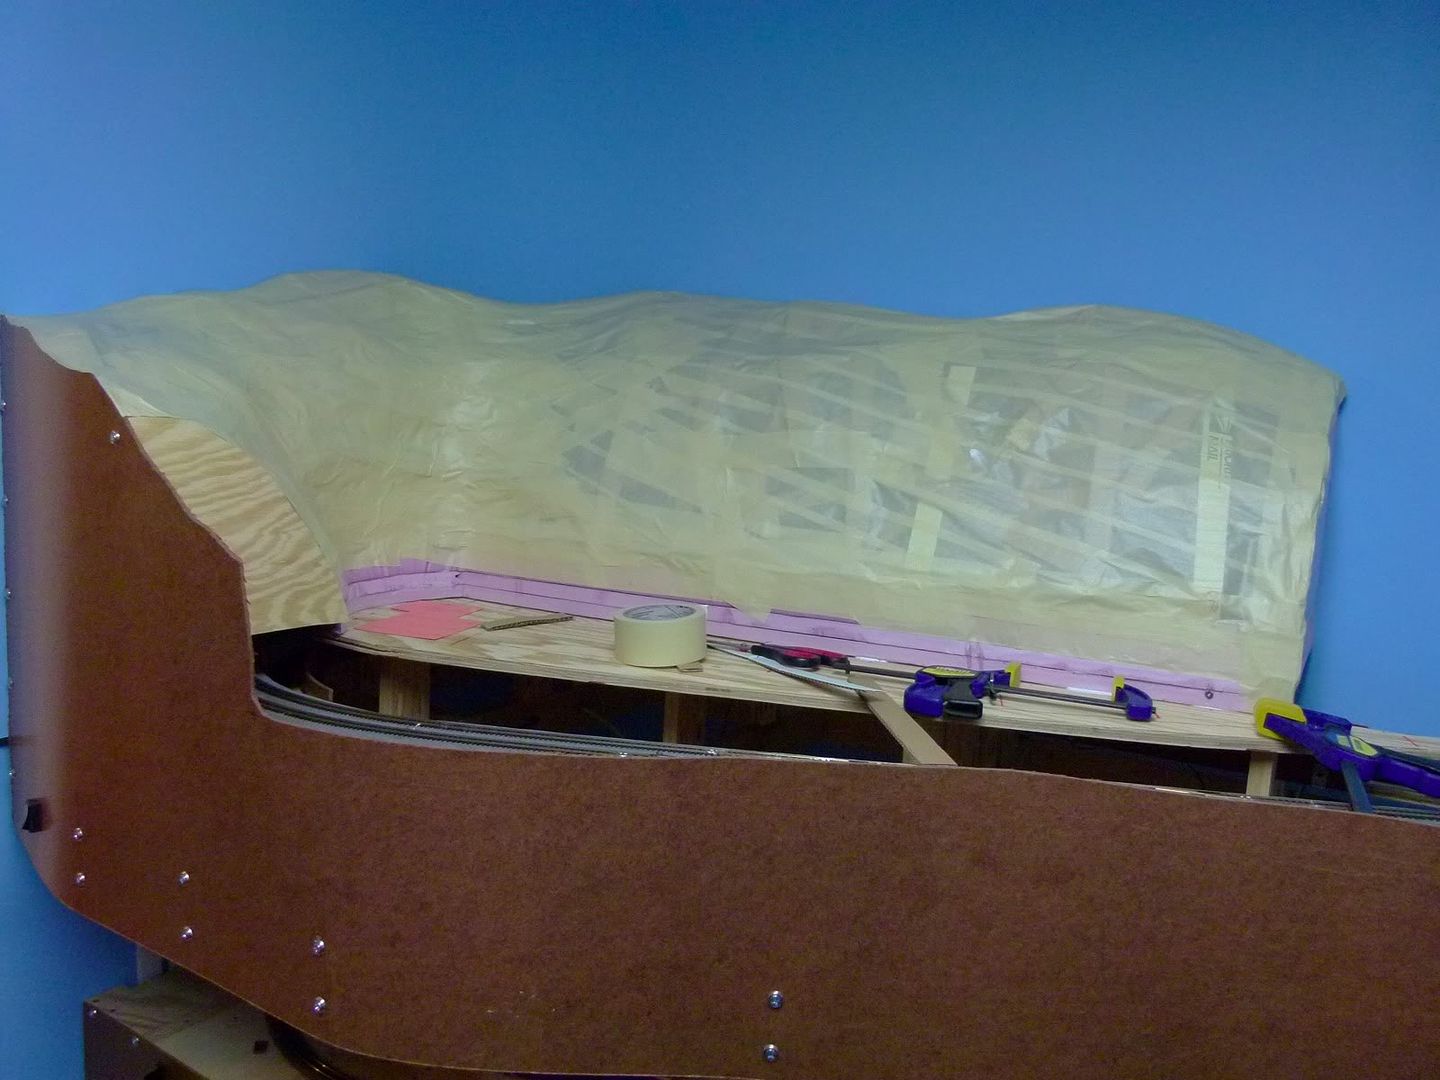
Well, with all respect to Devo, I have been working on the scenery in the Susan Bee mine area of layout, and I'm starting to see some results.  Here is where it is today:


As you can see, some of the rock faces are visible, and the first set of tunnel portals have been put in place.  Here is a little closer view of the tunnels:


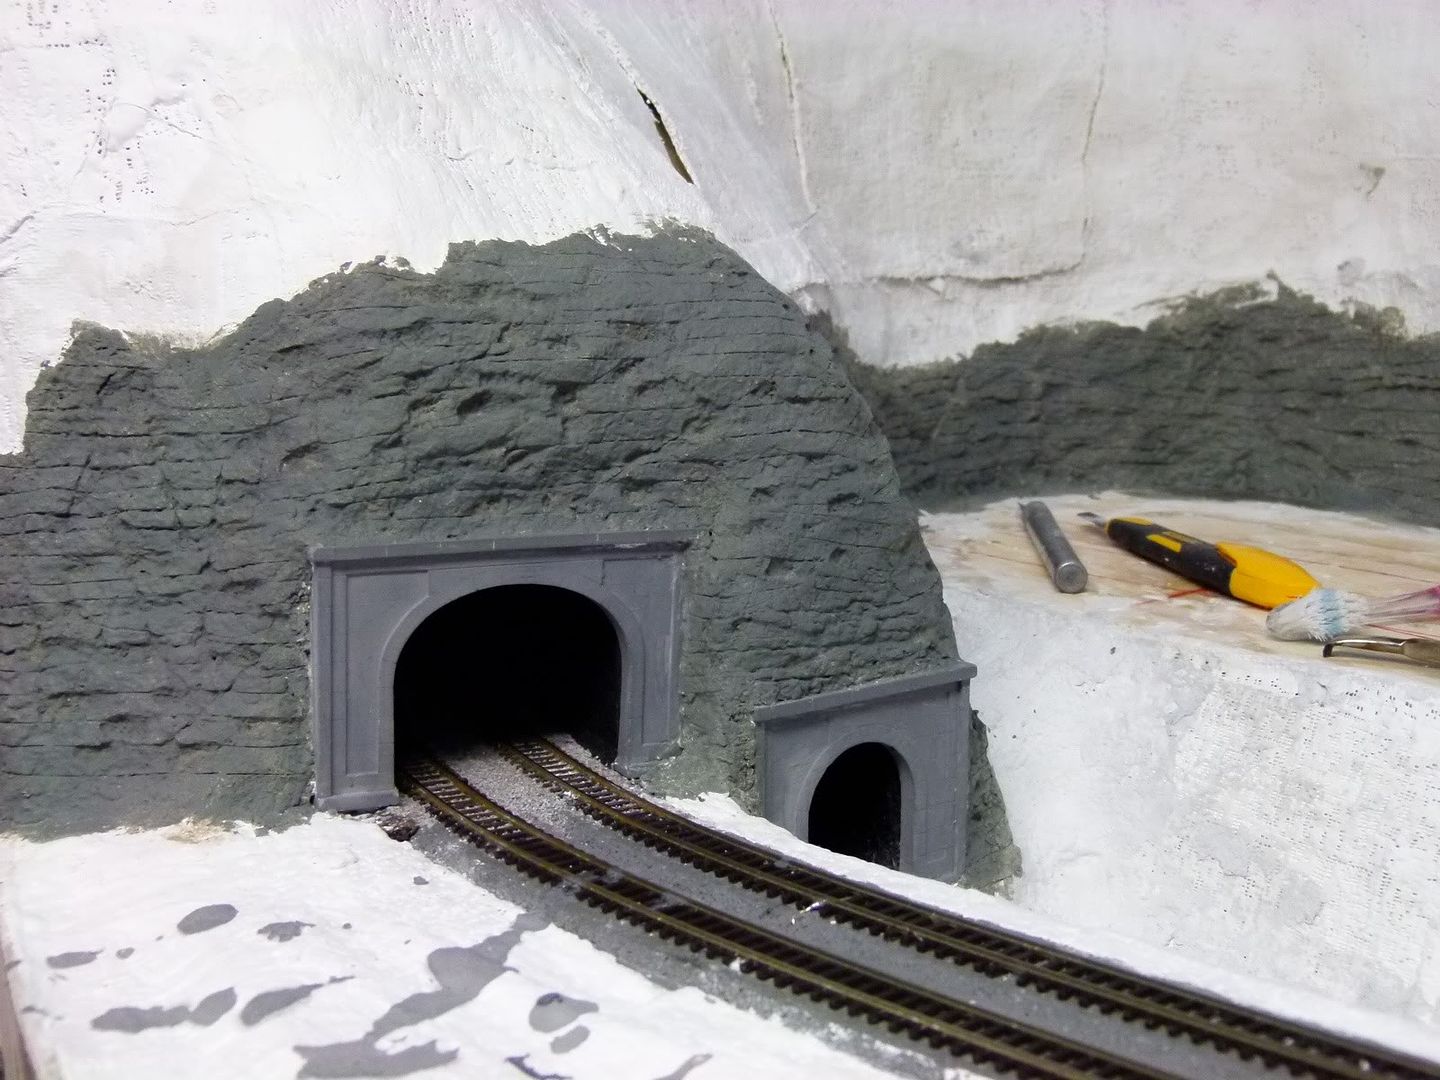
The tunnel portals are Woodland Scenics concrete portals, glued to the mountain base.  I painted them with grey primer for now, they will be weathered later for a more realistic look.  You can also see the rock work that I carved from Sculptamold around the portals and then painted, as well as some paint drips that will serve as a reminder to cover the track when doing scenery.  Luckily those will cleanup and not be seen after I weather the track.

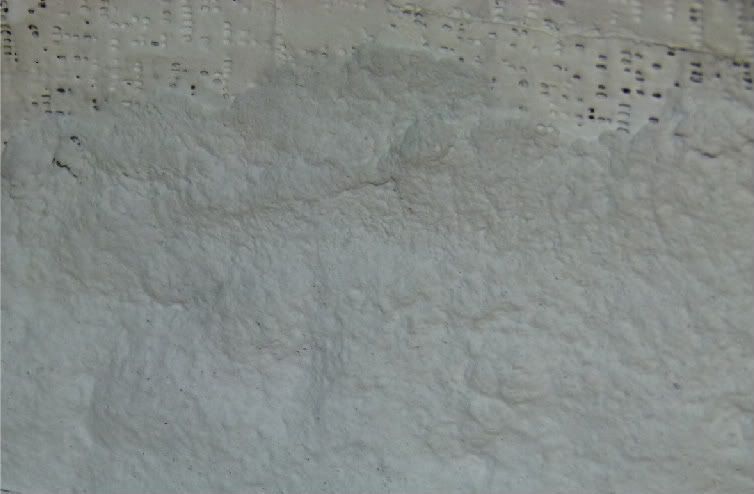
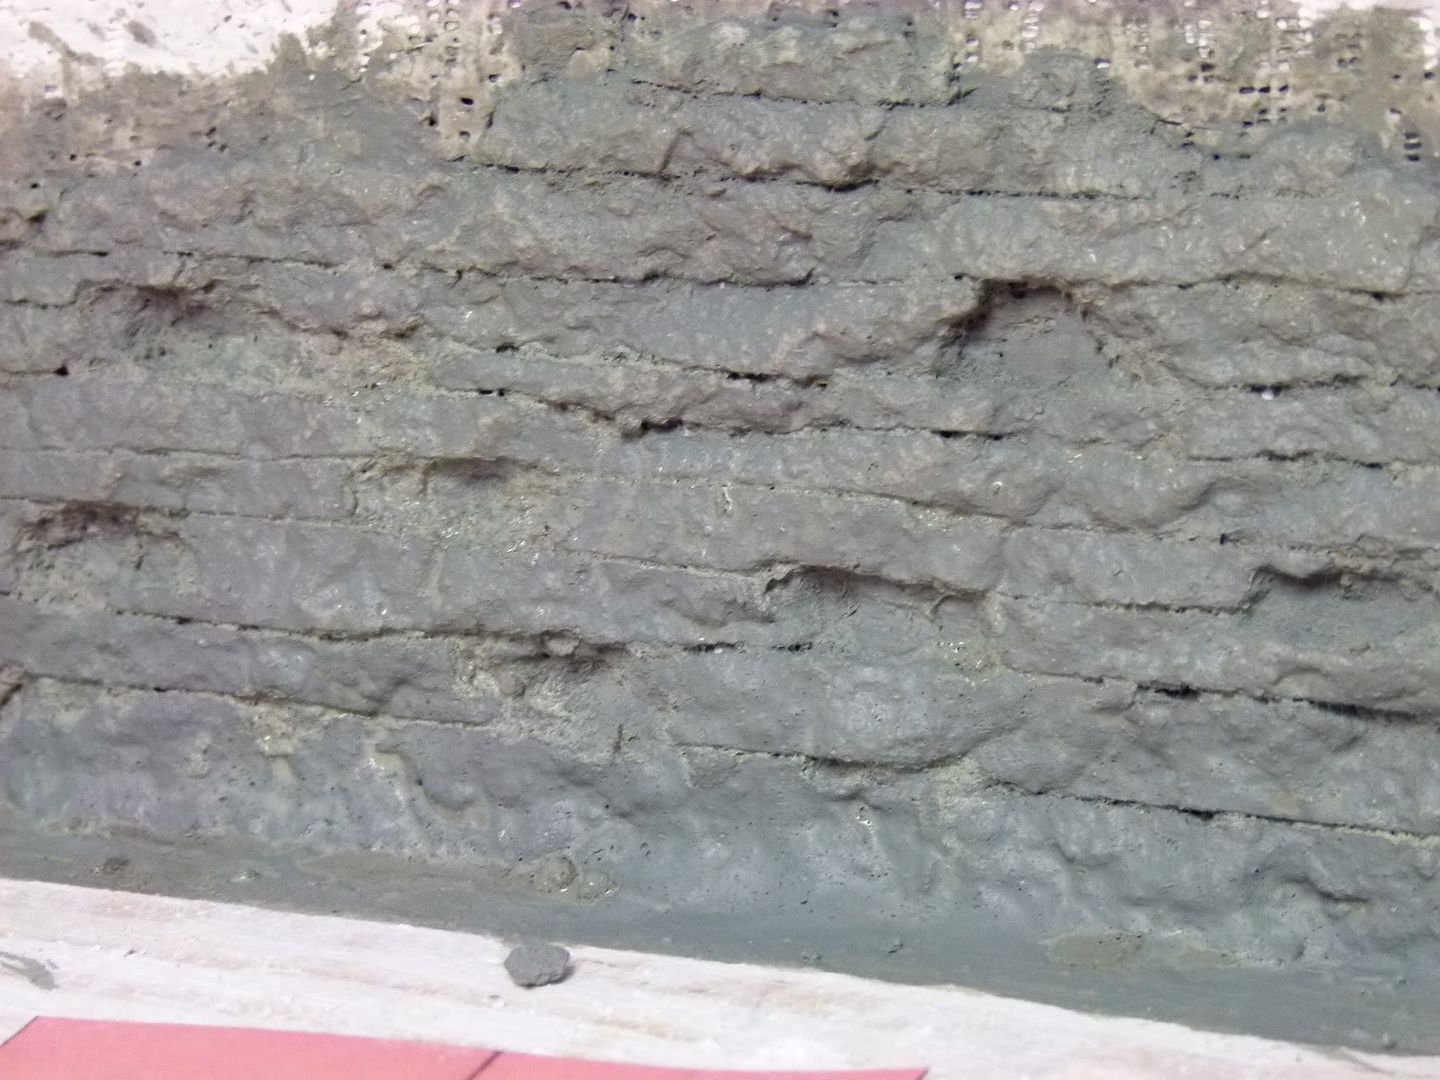
Let's take a look at how I did the rockwork:  Mix up some Sculptamold to the consistency of firm mashed potatoes.  You want it to be spreadable and not runny.  Take that and apply to the area where you want the rock face using your bare hands.  Spread it out about 1/4" thick, then smooth it out some, however don't make it perfectly smooth.  You want some undulations and waviness in it.  Once that is done let it dry for a couple of days until it is completely dry.  Here is what it should like:


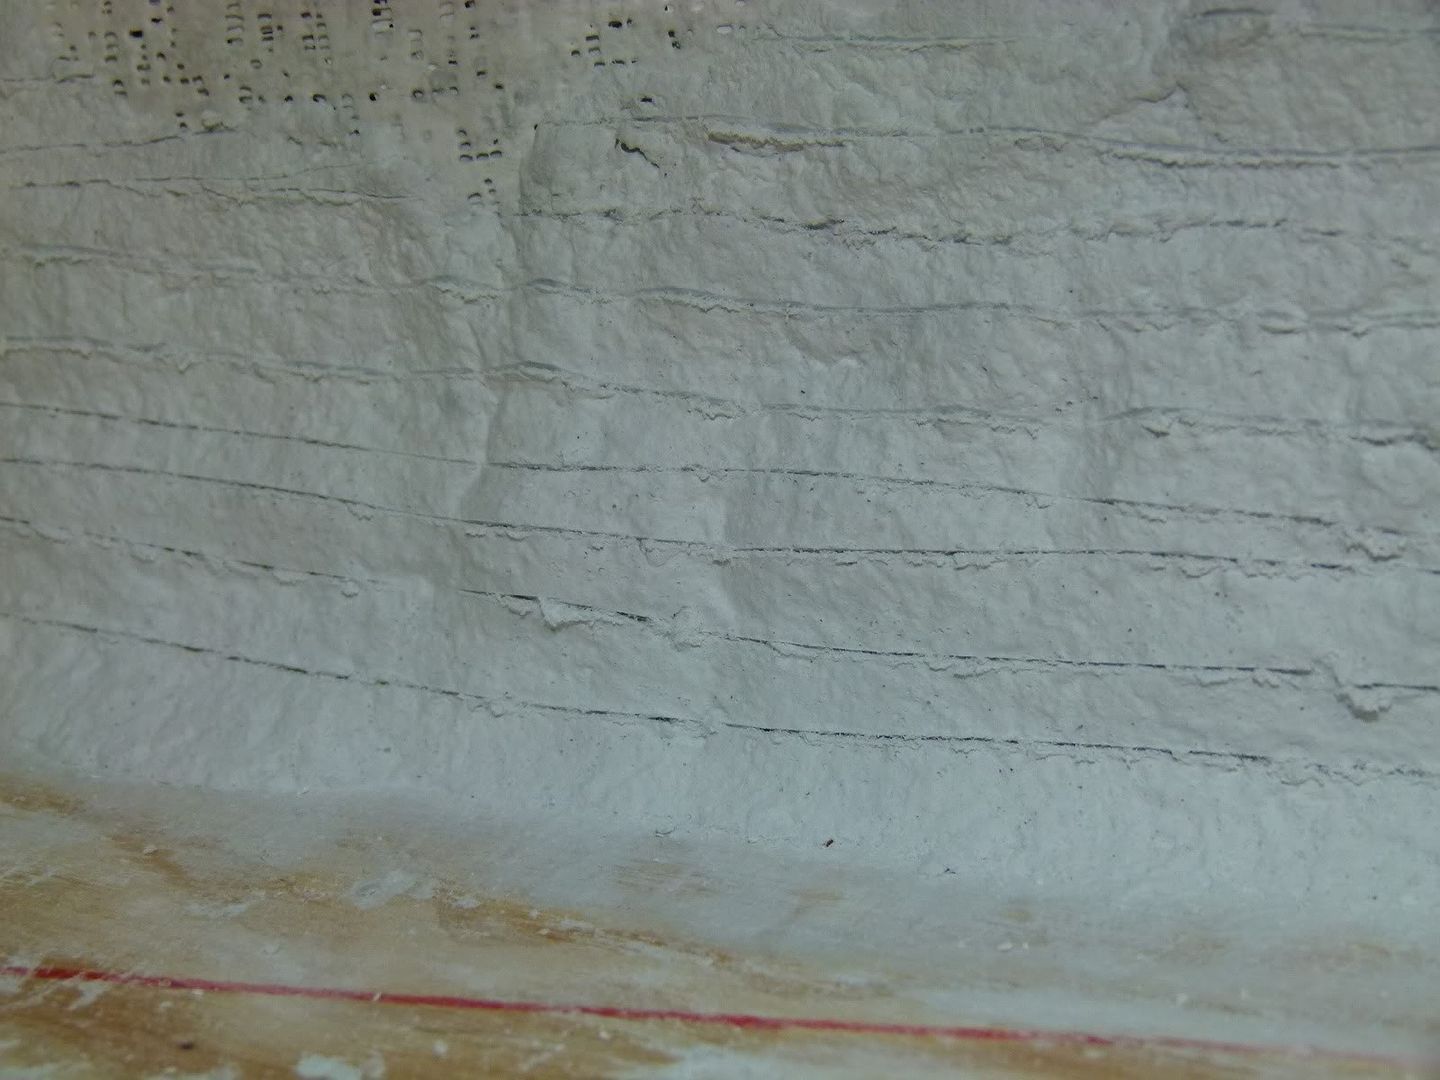
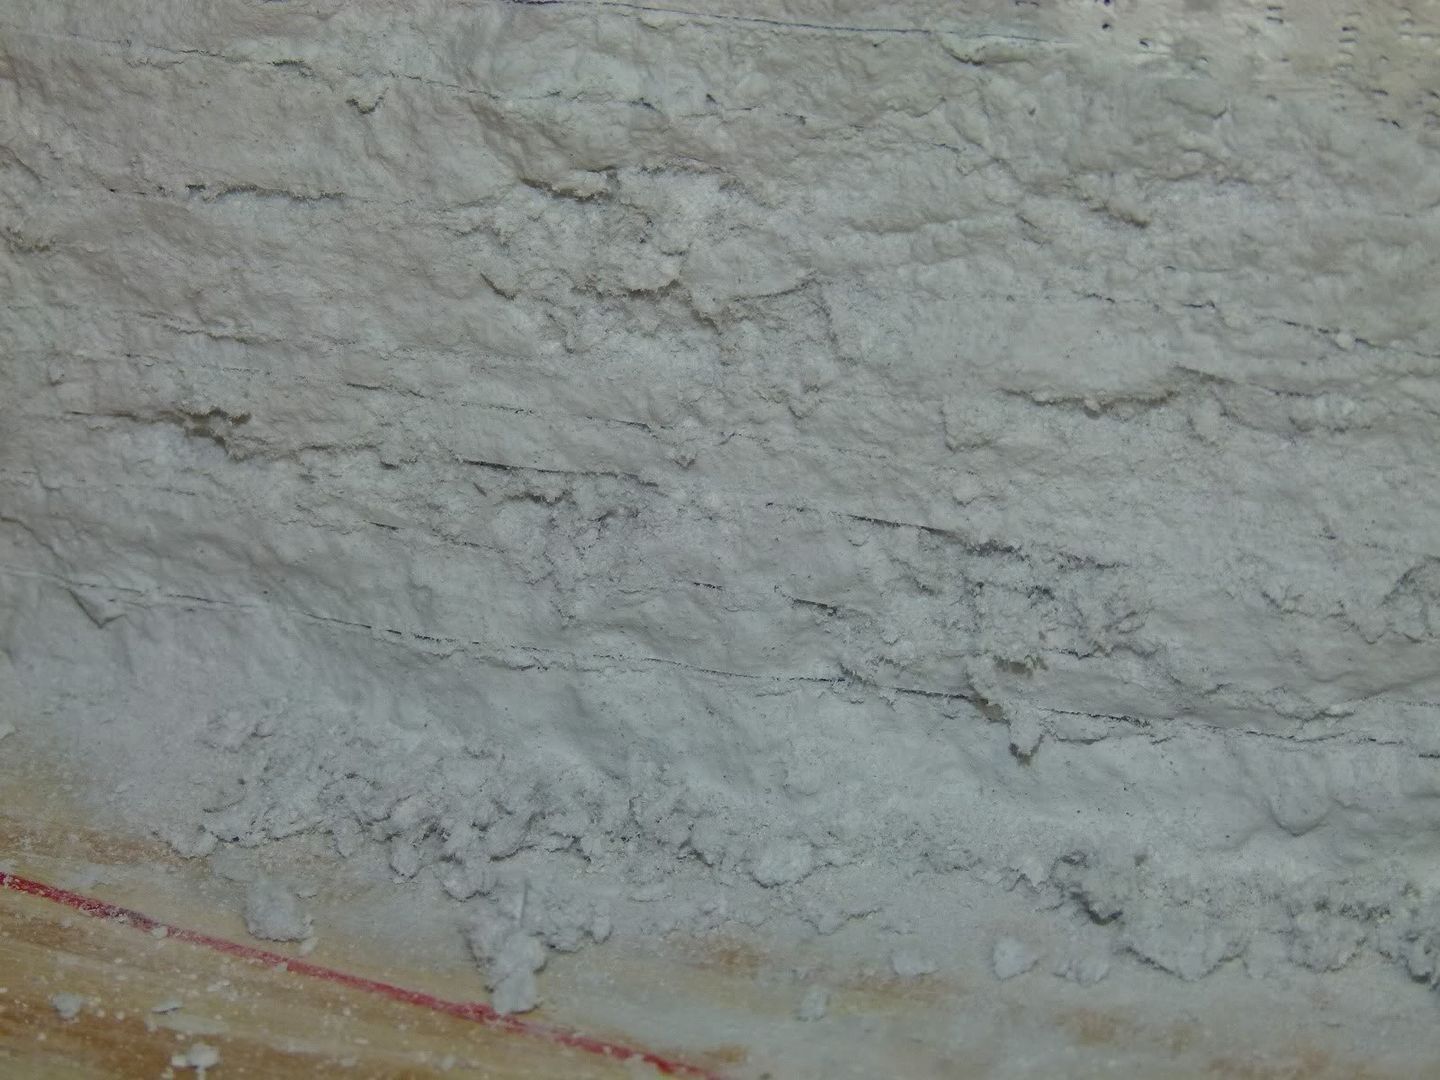
Next take a hobby knife and scribe some horizontal lines into the Sculptamold at irregular intervals, about 1/8" to 3/8" of an inch apart.  You don't want them too perfectly spaced...


Next take a small carving tool (a small flat tip screwdriver will work as well) and start making small gouges into the Sculptamold.  Once again, the more irregular and randomly spaced they are, the better.


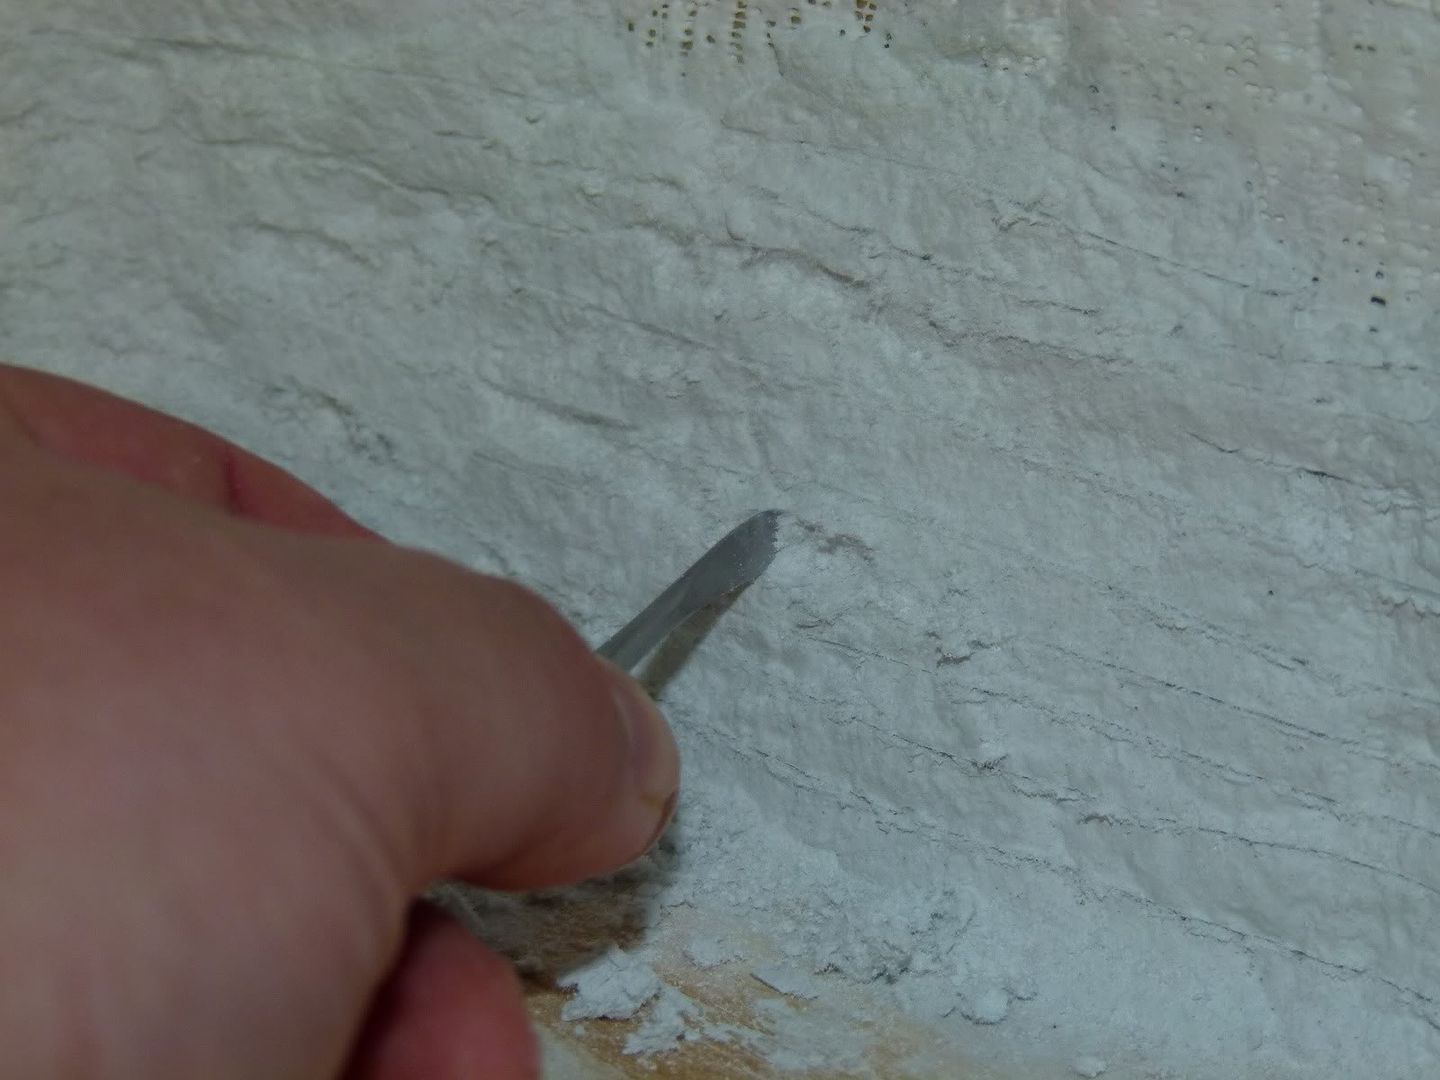
Here is what it should look like after the gouging.


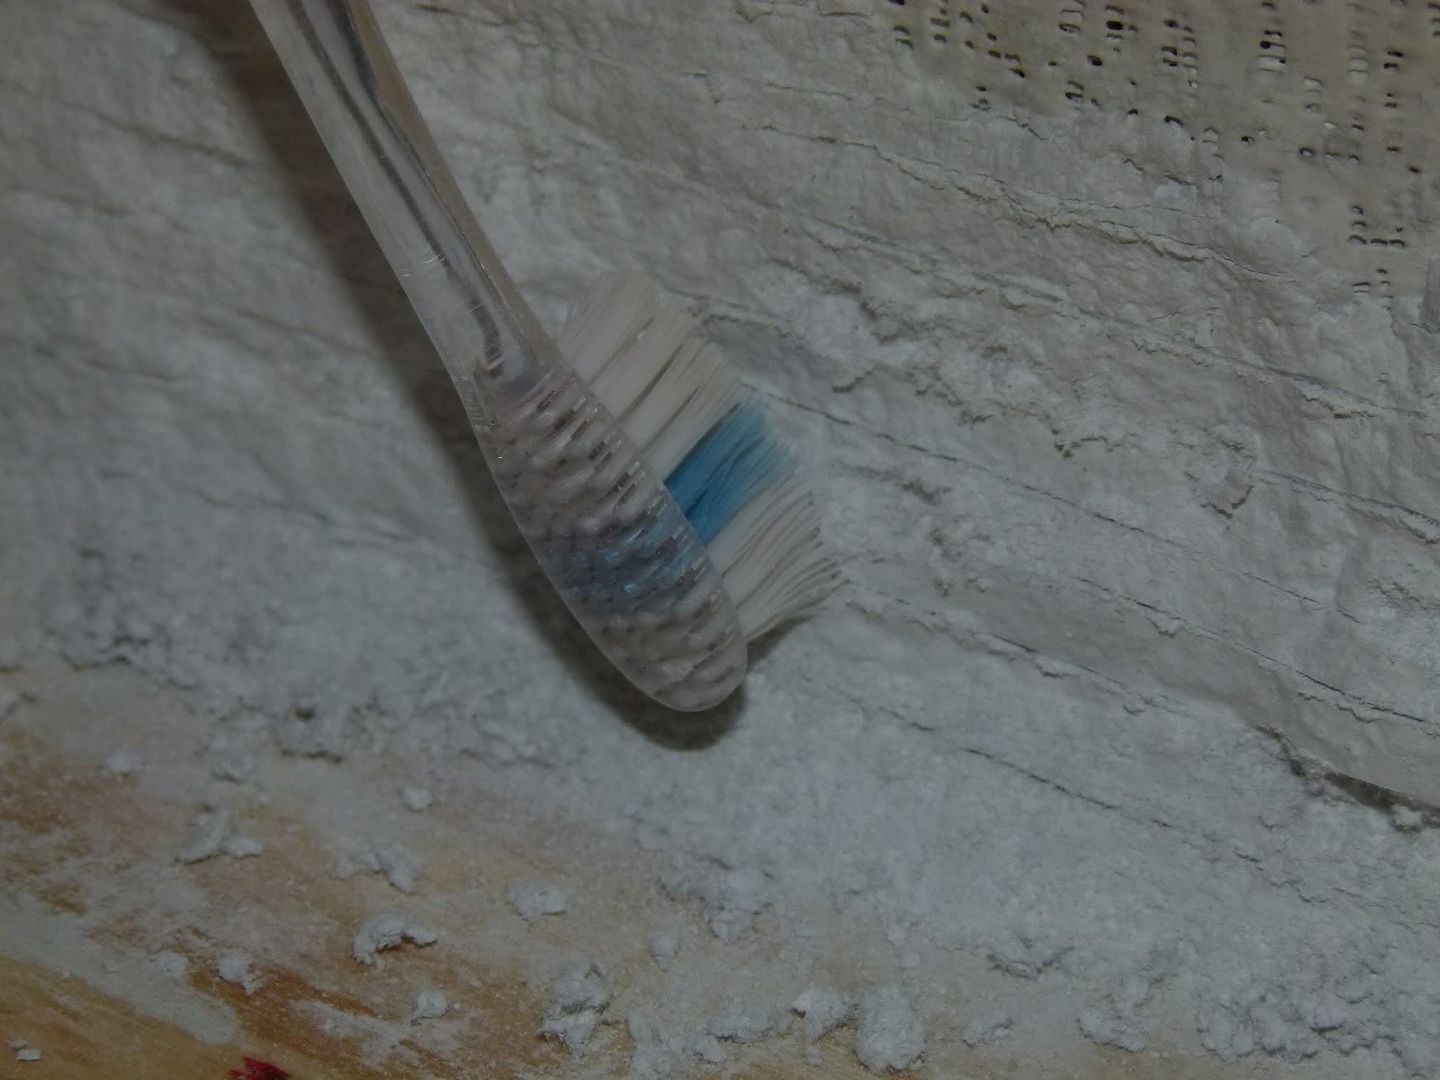
Next take a soft well worn toothbrush and smooth out any small loose pieces & fuzz from where the Sculptamold was carved.  


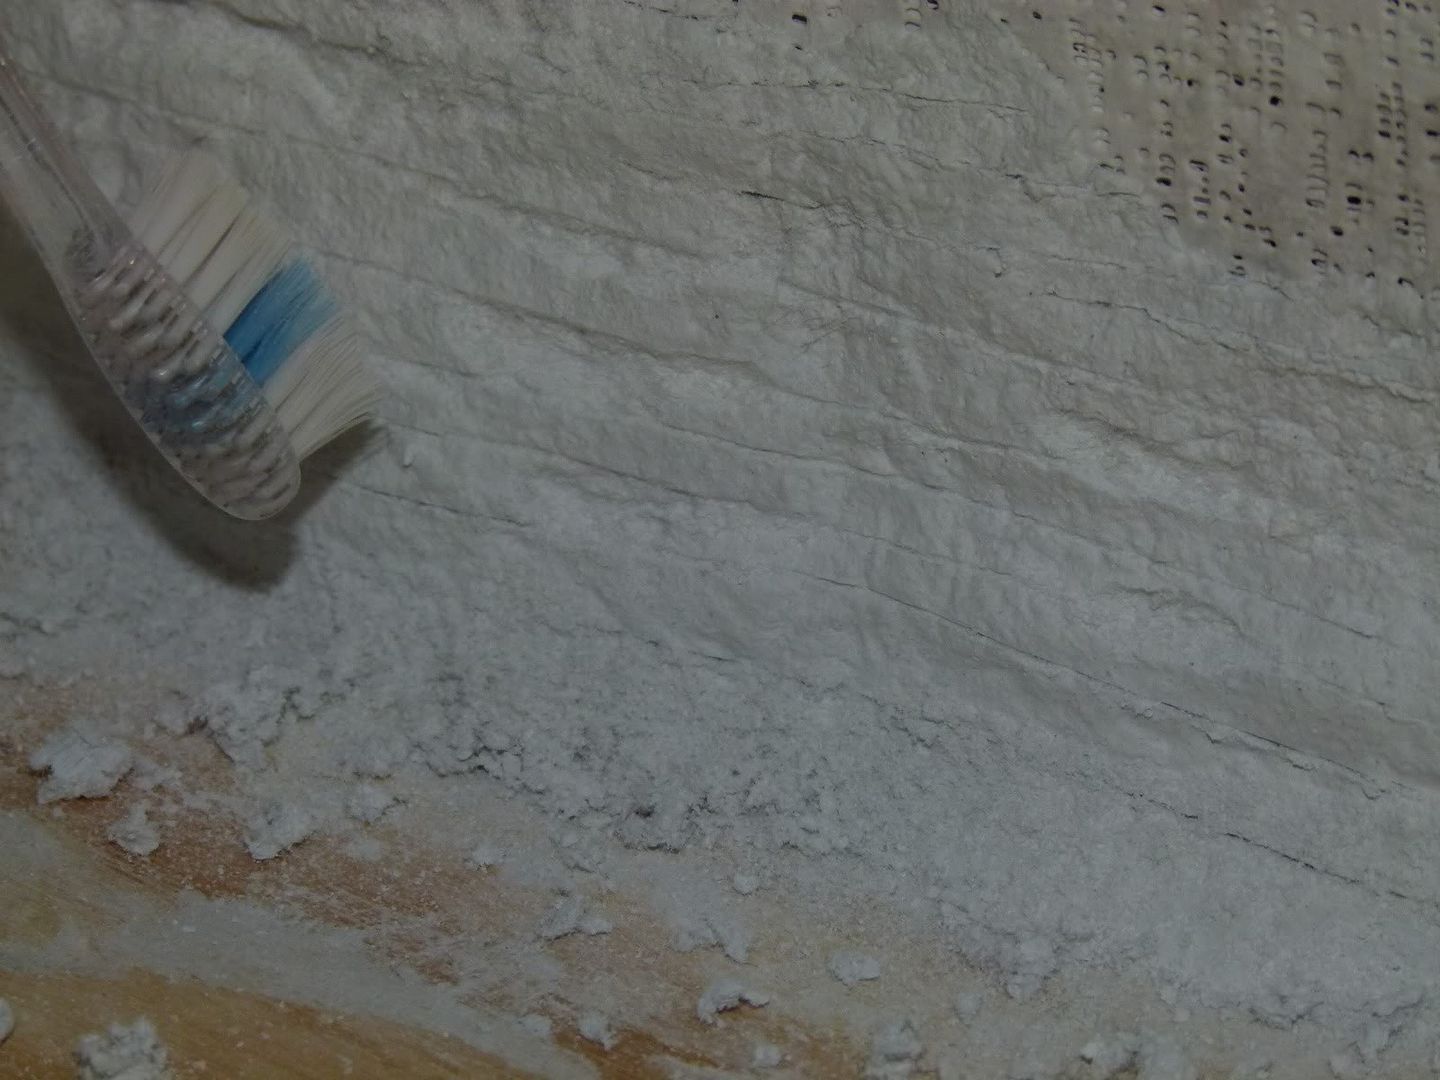
Here you see some of the debris from the brushing.  Go ahead and vacuum it away.


Now it's time to put the basecoat of paint on to the rock faces.  I'm using grey acrylic water based craft paint, purchased at your local Wal-Mart or Arts & Crafts store.  I mix it with some water, ratio 2/3rds paint, 1/3rd water.  You don't want it going on too thick, it will hide the details.


After 2 coats with a foam brush it will look like this:


...and a more closeup look:


That's the basics of how the rock work was done.  The look I was trying to capture is typical for the northern Alabama, Georgia and Tennessea area, horizontal strata rockwork of the southern Appalachian mountains.  It will look even more realistic later after some black washes and drybrush weathering of the rock faces is added, as well as the weeds and plant life.  

Until next time.....

Sunday, June 5, 2011

Layout Progress Report #23 as of 6/05/2011

Wow...6 months since my last post:  that's what happens when life gets in the way of your hobbies!!!  Nothing bad, just been busy with family, work and other interests.  Also gotten a little burnt out on Model Railroading....to be expected as I had gone 13 months straight working on the Cahaba Southern without much of a break!  But now I'm back into it, batteries recharged and ready to go!

I have continued work on the scenery base around the coal mine area.  After the base scenery lattice and mountain was completed in the last progress report I have now started to work on the areas around it:  the tunnel portals and scenery contours of the track and surrounding bridge.  I'm using more styrofoam and cardboard strips covered with masking tape for the basic shapes.


Once that was started I then used plaster cloth to form the hard shell.  Using the masking tape prevents the excess water from the plaster cloth dripping onto the level below.

A few words on plaster cloth: there are other sources besides model railroading suppliers.   Plaster cloth can also be found at medical supply and art supply, which often sell in bulk at reduced prices.  The cloth I'm using I purchased from Amazon in a 20 lb bulk box for under $49, and it was shipped free if you are member of Amazon Prime.  Considering each pack of Woodland Scenic plaster cloth costs around $10 and weighs 12 oz.....well, you do the math:  for the price of 5 packs of Woodland Scenic plaster cloth I've got almost 27 rolls now in bulk.  With the size of the layout I'm building I'm now set!

Here is the coal mine mountain with the base coat of plaster cloth down:


Next time around I hope to have the tunnel portals installed, as well as some plaster and Sculptamold in place for the basic rock formations.  Until then......and I hope it won't be 6 months this time!

Sunday, January 9, 2011

Layout Progress Report #22 as of 1/09/2011

Happy New Year!!!!  A new year is upon us, and it also marks the 1st anniversary of the new Cahaba Southern.  Wow, looking back at the pics and reports it is amazing how much has gotten done on the layout so far, and there is much left to do.....

While the holidays and family took a lot of my time out of my railroading schedule, some model railroading was accomplished.  Numerous engines were converted to DCC and a front fascia was added to the upper level.  However, the most visible and biggest amount of time was spent on the first hillside, which will be behind the location of the coal mine area.   The hill itself will have to allow access to the track hidden inside, so that will add some complexity.  It will be constructed using a variety of established techniques and materials.

First things first I need to build a base for the hill.  To do this I use some scrap cardboard and create a template as shown in the following pics.


Once the template is completed I marked the locations of where the base will be resting on the existing plywood.  I then use this to cut the first two layers of the base from 3/4" extruded styrofoam.  Before I attached the 2 layers together I drilled some holes thru the bottom layer and the plywood underneath for some screws and washers.  As I will be doing a good portion of the building of this hillside away from the layout this gives me way to make sure I put it back in the same place during the various stages of fitment.  In the following picture you can see the bottom layer in place with the screws and washers, and I'm getting ready to put the second layer on top of it.  I will secure the layers together using some Loctite Power Grab latex construction adhesive, temporarily inserting nails to hold things in place.


Once these two 3/4" pieces were done I had created enough of a clearance height to then make a solid piece the size of the original cardboard template.   This layer I made from 2" styrofoam for strength and stability.  I then also measured the desired hillside height, then laid out 2 profiles for this on some more of the 3/4" styrofoam and cut it out.  I attached these to the 2" base and glued them in place to create the back of the hillside.  Note that I could not use one single piece for the back as the curved corners of the backdrop would not allow that.  I then glued some more 3/4" pieces of styrofoam in place that will be the "ribs" of the mountain.  I used some temporary nails to hold things in place and perpendicular, then let it sit overnight to allow the adhesive to set.


After that had dried I carried the hillside back to the layout to get an idea of how it will look.


The next step is the cut the profile into the ribs.  To do this I marked with a Sharpie the desired profile and then used a Woodland Scenic Hot-wire foam cutter to cut the profiles into the ribs.


Ready for the next step, the hillside got removed and taken back to my workarea in the garage.  In the next pic you can also see the cardboard strips that I will hotglue together onto the hillside to make the skin.


Unfortunately I got a little build-happy and didn't take any pics of the next step, which is to cut access holes into the  base and the ribs.  These holes will be used in the future to get at any problems that may occur on the track underneath.

After the holes were cut, the cardboard strips were crisscrossed and applied to the hillside with hot glue.  This is shown in the following pic, and you can also see the access holes that were cut in the base and ribs.


Next picture shows the cardboard web completed, with the layer of masking tape started to cover the web.  The masking tape will be the base upon which plaster cloth strips will be put on to the hillside.  The masking tape smooths the contours for the plaster cloth strips as well prevent the wet plaster from falling thru the hillside on to the track below.


The next pic shows the hillside in it's final position.  This is also the first picture that shows the fascia that was installed on the main level.  Notice the masking tape on the left side is not in place yet.  As this section will have to butt up to the fascia the web first needed to be extended to the fascia, then the last of the masking tape applied.


The next pic shows the web from the hillside has been extended to the fascia and then covered with the masking tape.


This final pic for now shows an overall view of the hillside in place.


As you can tell by the above pic, the base of the hillside is there.  Next I have to build the tunnels which will integrate into the hillside.  Once those are in place, then it becomes time for the plaster cloth cover.  Hopefully I'll be able to post about that next time.....til then!